–
This piece was written by Arran, HES Heritage Plastering trainee at Messenger BCR from September 2019- 2020
–
Arran is our Heritage Plastering trainee, working with Messenger BCR on historic buildings across the East of the UK and the East Midlands. He is a very enthusiastic trainee and has written a description of a job he was working on in May 2020, which you can read below. Watch this space for other interesting blogs about plastering, he’s promised us one about traditional mouldings next!
My mentor and I are currently working on a beautiful Georgian property within the county of Hertfordshire; this is for a private client so the house is not open to the public. The property is an independent school though, so it is open to private clients and potential students.
Working on schools requires a stricter deadline due to the limited time that you have to complete the repairs, this job in particular has been given a maximum time limit of 5 weeks to complete as children need to return in order to receive an education. With this in mind, work needs to be completed to the best of our ability and carefully planned so we are ready to pack up and leave by the end of week 5.
Stage 1- Damaged ceiling
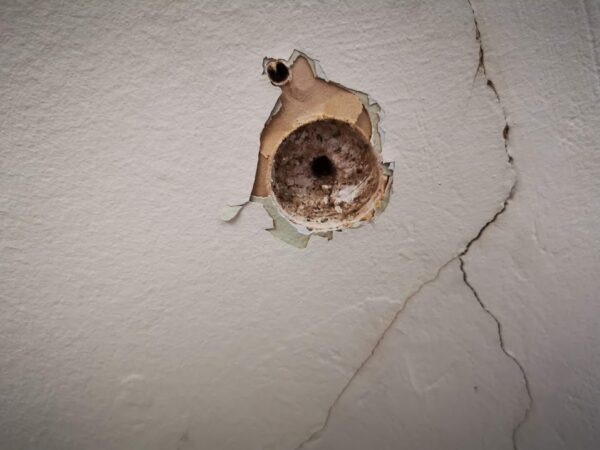
We are currently repairing a larger lath and plaster ceiling alongside a cornice, both of which have been damaged due to water ingress. There are several repairs that you can make to secure a ceiling, but the one we will be using offers excellent results without having to tear down parts of the ceiling that may not need to be torn down. This system works by drilling into the ceiling with a flat drill bit and adding a screw with a washer on in order to secure that part of the ceiling in place around the cracks. This gives an effective repair, providing it has been done correctly. It works by removing the pressure from the crack and allowing that part of the ceiling to be secured in place by the screw and washer that is now taking the weight.
Stage 2 – Begin the repair

Lime plaster is usually applied in 3 coats to lath work. When carrying out the ceiling repairs, we drill into the second layer of lime plaster. We then make a pilot hole through a joist for the screw and washer to be screwed into, however not all cracks run alongside a joist so this can sometimes be difficult – the next alternative is lath. The screw and washer need to be tightened carefully as too much pressure can damage the ceiling and render the repair useless. Once the screw and washer are secured, the debris is removed from the crack and this is filled in using a mix of lime putty and casting plaster – this allows for a quick set time and also adds strength to the mix.
Stage 3 – First layer of plaster to cover repair
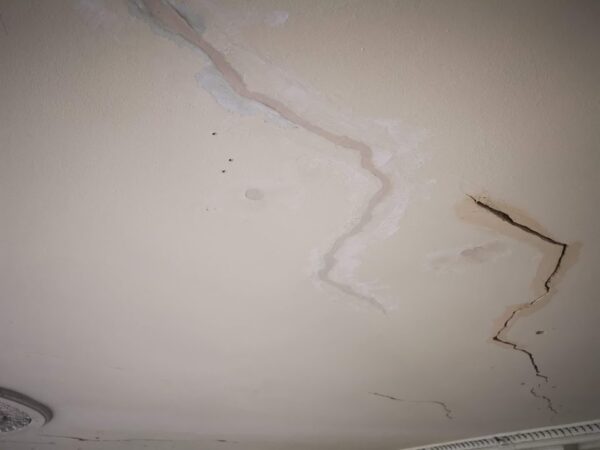
Once the vital repairs are complete, we can then move on to the preparation for painting which includes sanding and, in some cases, extra filling over the ceiling to hide the previous repairs so it all blends together smoothly.
Experience is vital and I’m lucky to be in the hands of experts who have been using this technique for many years. Without such repairs and knowledge from people who have been in the trade for many years, it would be tempting for someone without that knowledge to just remove parts of the ceiling and replace them with modern plasterboard and fillers. This is usually done in order to avoid having to deal with future problems and also lack of proper knowledge/training, however, it will usually cause problems again in the future because the plasterboard doesn’t “flex” like a lime plastered ceiling does – thus creating cracks around the area of the plasterboard.