Investigation Techniques
Topic 3: Investigation techniques
As well as making a record of what is visible on the ground, archaeologists have a number of investigation techniques that allow them to find further information. Some of these will be used on the study sites as appropriate, but as they can effect the preservation of the site, they should only be done with the permission of the landowner and under the guidance of a qualified archaeologist.
Fieldwalking
Field walking is a method which looks at the artefacts and fragments of artefacts that are present in the topsoil to give an indication of the history of the site.
Fieldwalking is best done after an area has been ploughed and has been rained on at least once. If fieldwalking can be done before the new crop is planted, it presents less of a disruption for the landowner, but they will probably advise you when a piece of land is available.
It is important to remember that the artefacts observed on a piece of land are the property of landowner and should not be taken away. Observe and record, do not remove. Bearing this in mind it is better to have an organised field walking investigation, where an archaeologist is on hand to identify artefacts, than to work alone.
Random
Random field walking is exactly what it says. Walk across the field in any direction or pattern and make a note of the artefacts you see, and make a sketch of where they are located. If you come across something you don’t recognise, take a photograph and you can research what it is at a later date, you could also ask advice from a professional archaeologist.
Systematic
Systematic fieldwalking is carried out by walking the field in straight lines at set intervals. The locations of artefacts are noted along the line walked, and these can be plotted on a plan of the field. As previously stated, this is a great group activity, particularly if you have someone on hand to identify the artefacts you observe.
Geophysical Prospection
Archaeologists use a number of Geophysical techniques in order to predict what archaeological features lie under the ground. These techniques require specialist equipment and training to carry out. It is hoped that the Layers of History project will be able to demonstrate some of these methods on the study sites.
Magnetometry
The most commonly used method is Magnetometry. This measure small changes in the earth’s magnetic field. These changes are often the result of human activity, such as digging or burning, or the dumping of fired clay products such as brick, tile and ceramics. A plan of the changes recorded can indicate the outline of ditches, pits and other buried remains.
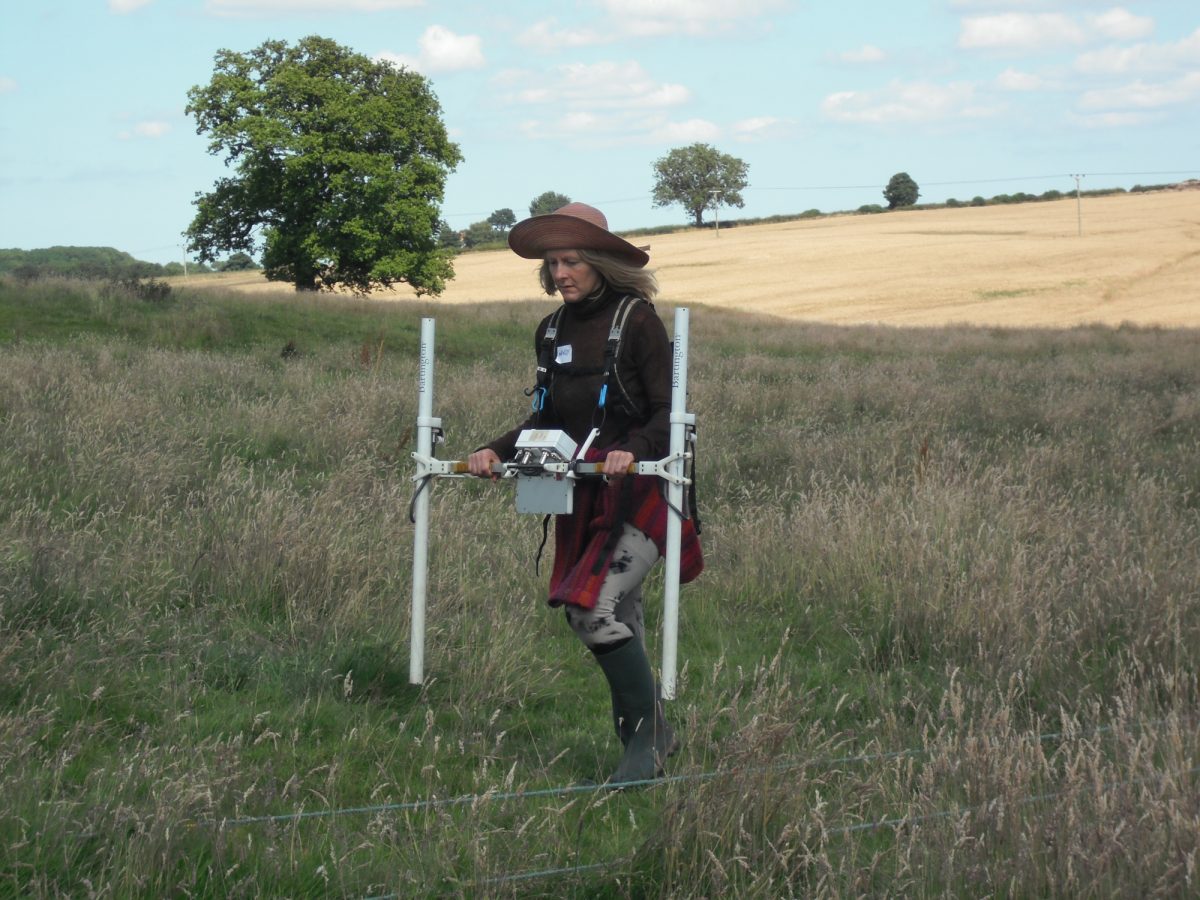
Volunteer collecting magnetometry data at Biscathorpe.
Resistivity
Another method that is commonly used is Resistivity. This uses metal probes to measure the resistance of the soil to an electrical currant, and can indicate the presence of walls and ditches.
Ground Penetrating Radar
More recently, Ground Penetrating Radar (GPR) has been used to locate buried archaeological remains.
Excavation
When people think of archaeology, they usual think of people digging holes to find things. In fact this is only a small part of what archaeologists do. Excavation is a destructive process, and so archaeologists limit the amount they excavate, and only start digging if the buried remains are under threat or they have done all the other investigation possible first.
The Layers of History project is focussed on the identification of sites and their investigation by non-destructive means. It is not envisaged that excavation will form part of the project.
This does not mean that it could never happen, but it would require its own project with all the relevant permissions from landowners, local authorities and national organisations.
EXERCISES
1
The following table provides the angles and distances in millimetres for the inside and outside of a shape. On a piece of paper, place a cross in a triangle to represent a surveying point (best place for this is near the bottom left hand corner) and draw a straight line from this point towards the top of the page to represent north and 0o. Using a protractor, measure each angle, then use a ruler to measure the distance to each point and mark it with a cross. Once you have done this with each of the points, use a ruler to draw a line round the points to create a shape.

What famous building might this represent?
2
The table below represents a line of levels taken (west to east) across a landscape feature. Most have been taken at 1m intervals, but some have been taken at half metre intervals for extra detail. Calculate the collimation and the reduced levels.
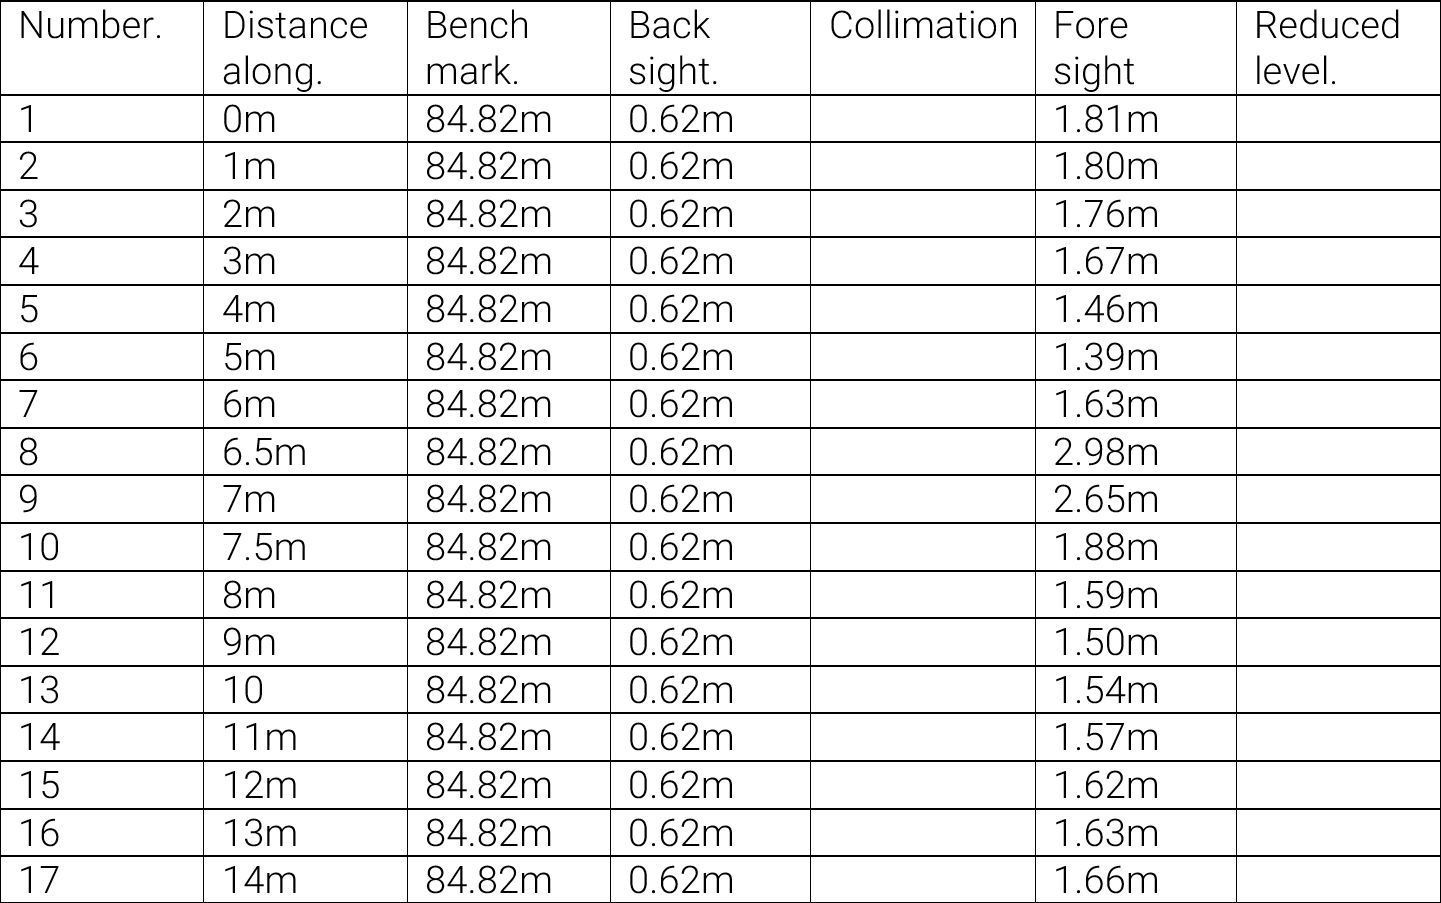
Once you have worked out the answers, why not take a piece of graph paper and have a go at drawing the profile of the feature to scale. Try drawing at scales of 1:100 (1cm equals 1m), 1:50 (1cm equals 50cm), and 1:20 (1cm equals 20cm). Does the scale make a difference to the profile?